PLONK on Bitcoin – CoinGeek
This post was first published on Medium.
We are proud to announce that Bitcoin now supports PLONK. For a detailed description of how PLONK works, you can see our previous explanations, part 1 and part 2.
We previously implemented Groth16, the smallest and most efficient SNARK construct. However, it requires a reliable setup for each circuit. By eliminating the need for a reliable setup per circuit, PLONK both reduces concerns regarding the security of this process and ensures that no secure multiparty computation (MPC) setup ceremonies will be required again if the circuit is changed in the future due to e.g. critical bug fixes. Universal and updatable setup ceremonies, such as Perpetual Powers of Tau, can be reused for all circuits in PLONK. It makes deploying new circuits and upgrading existing circuits much easier and safer.
Run your first PLONK on Bitcoin
We’ve added PLONK support to our existing snarkJS library, which is fully compatible with Circom. All Circom circuits developed for Groth16 can be directly reused in PLONK without any changes at all. The full PLONK verification code can be found here, along with a test in Javascript. Generating a PLONK verifier is similar to developing a Groth16 verifier in snarkJS.
You need to install the Circom compiler and snarkJS first.

1. Design a circuit
Implement circuits in the Circom language. For example, this simple circuit/program called ‘factor.circom’ proves that people know how to factor the integer ‘n’ into two integers without revealing the integers. The circuit has two private inputs called ‘p’ and ‘q’ and one public input called ‘n.’ For more information on how to use Circom, please refer to
2. Compile the circuit
Compile the circuit with the following command:
![]()
3. Start a new **powers of rope** ceremony
The ‘new’ command is used to start the **powers of tau** ceremony.

Finally, we confirm the protocol so far:
![]()
4. Setup
This will generate a proof key for the circuit and verify that key using PLONK.

5. Export verification key
We export the verification key from ‘circuit_final.zkey’ to ‘verification_key.json.’

6. Calculation of a witness
First, we create a file ‘input.json’ containing the circuit inputs with the following content:

Then we use the ‘factor.wasm’ obtained from compiling the circuit to calculate the witnesses:
![]()
7. Create a proof
It uses the proof key and witnesses to generate a proof using PLONK.

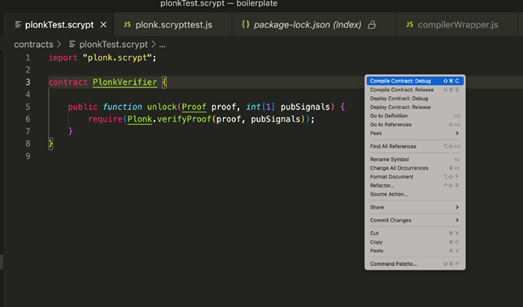
8. Export a sCrypt verifier
This emits a smart contract file “verifier.scrypt” that contains all the code needed to verify the proof of chain.
![]()
You can verify it locally:
![]()
9. Deploy the verifier
You can now deploy the verifier to Bitcoin. Pack in verify.scrypt in a trial contract PlonkVerifier as Below.
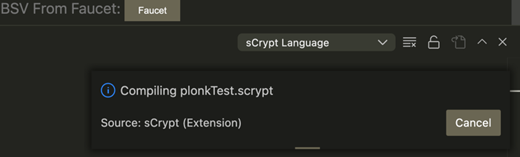
Now you can use the sCrypt IDE to deploy it.
Right click and select Implementation contract: Troubleshooting.
After the contract is compiled, which should complete within a few minutes, the following panel should appear. Click Deploy.
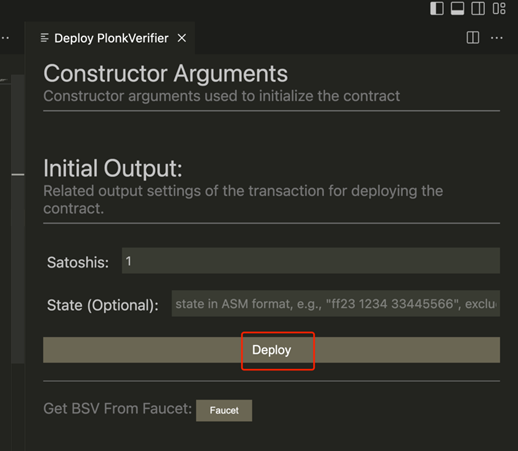
If all goes well, the verifier’s contract should have been deployed.

10. Verify the proof
Then you have to copy and paste from proof.json into Calls panel and click Callunlock().
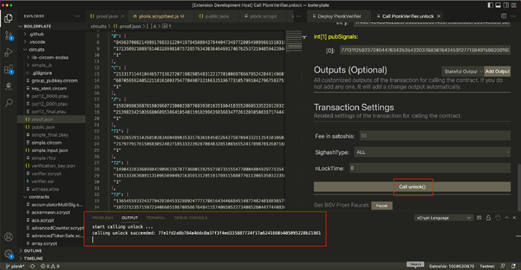
If everything is working ok, you should see the proof validated in a spending transaction.
What’s next?
Congratulations! You have just created your first PLONK Proof of Bitcoin. So far we have implemented both Groth16 and PLONK. Any proof system can be implemented in the same way as a smart contract, thanks to Bitcoin’s programmability and scalability. Now it’s time to implement your favorite trial systems, including Marlin, Sonic, Halo, Bulletproof, and STARK.
See: The presentation of the BSV Global Blockchain Convention, Smart Contracts and Computation on BSV
width=”560″ height=”315″ frameborder=”0″ allowfullscreen=”allowfullscreen”>
New to Bitcoin? Check out CoinGeeks Bitcoin for beginners section, the ultimate resource guide for learning more about Bitcoin – as originally envisioned by Satoshi Nakamoto – and blockchain.


